
NOTE: Not shown to you are non-file things in ibm_dos_33_on_720k.imz, such as the MBR and FAT's.
NOTE: We are using {Write Disk} instead of {Format and write disk}, because the diskette has already been formatted at step 3.
| Home |
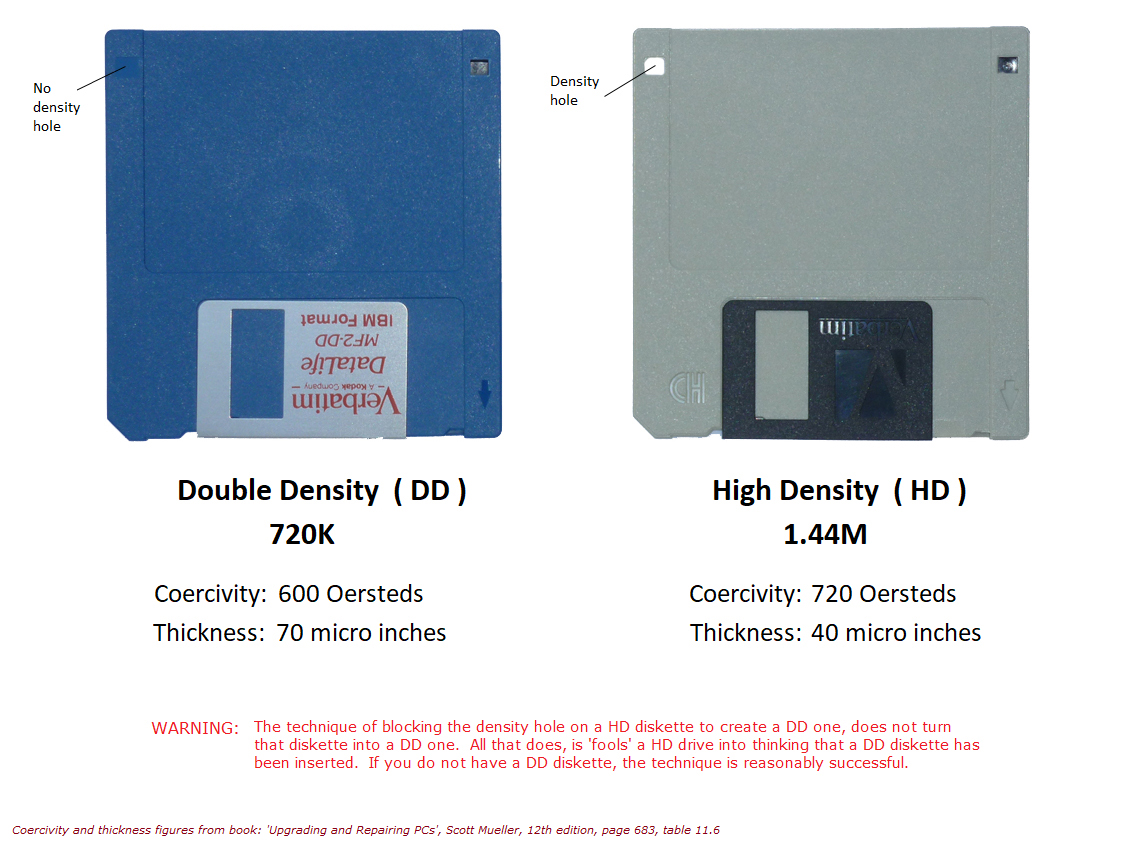
| Step 1 | Obtain a 720K diskette that you are prepared to overwrite. See here for the difference between 720K and 1.44M diskettes. A 1.44M diskette with its density hole suitably covered should work instead - not a legitimate action, but it should work for the purpose of what we are about to do in the following steps. |
| Step 2 | Place the 720K diskette into the 1.44M drive. |
| Step 3 | Format the 720K diskette per here. During the formatting procedure, verify that you see "Verifying 720 KB" and "713.0 KB total disk space" in the displayed text. |
| Step 4 | For later use in this procedure, download image file ibm_dos_33_on_720k.imz (an image file of a 720K sized IBM DOS 3.3 boot diskette) to your hard drive. |
| Step 5 | Download WinImage 11.00 software from http://www.winimage.com and then install it. |
| Step 6 | Of the two WinImage icons/shortcuts, click on the 'WinImage (administrator)' one. A 'User Account Control' window will open. In that window, click on the 'Yes' button. WinImage 11.00 will open. |
| Step 7 | [WinImage]: On the menu bar, click on {Disk}, and in the menu shown, verify that the drive selected is your 1.44M one. |
| Step 8 | [WinImage]: On the menu bar, click on {File} then {Open}. Navigate to where you downloaded the image file of ibm_dos_33_on_720k.imz to, and then select that file. WinImage will open the file, then display the 11 files within, like this. NOTE: Not shown to you are non-file things in ibm_dos_33_on_720k.imz, such as the MBR and FAT's. |
| Step 9 | [WinImage]: On the menu bar, click on {Image} then {Image Information}. In the window that opens, verify that the 'Total Image Space' figure is 737,280 (i.e. 720 KB). Close the window. |
| Step 10 | [WinImage]: On the menu bar, click on {Disk} then {Write Disk}. You will hear the diskette being accessed, and then you will see a window containing "Disk A: is not empty ........ Do you want to continue?". Click on the {Yes} button. A 'Writing disk' window will appear, showing you the progress of the image being written to the diskette. NOTE: We are using {Write Disk} instead of {Format and write disk}, because the diskette has already been formatted at step 3. |
| Step 11 | [WinImage]: When writing is complete, close WinImage. |